diy epoxy floor installation
Achieving Professional Results with DIY Epoxy Floor Installation
Are you trying to determine whether you can achieve a professional quality epoxy floor finish as a DIYer? Installing an epoxy floor can provide a durable and stylish solution for your garage or basement. Whether you choose to do it yourself or hire a professional, there are key steps and considerations to ensure professional results. This article will guide you through the process, from understanding epoxy flooring to surface preparation, mixing and applying the epoxy coating, curing, finishing touches, and troubleshooting common mistakes. With the right knowledge and techniques, you can achieve a professional-quality epoxy floor installation.
Epoxy floor installation involves the application of a durable epoxy coating that can withstand heavy foot & vehicle traffic( often referred to as tesion), chemical spills, and other daily wear and tear. By opting for a DIY approach, you have the potential to save money and take pride in completing the project on your own.
However, achieving professional results with a DIY epoxy floor installation requires careful planning, attention to detail, and adherence to best practices. It’s essential to understand the specific steps involved and the potential challenges you may encounter along the way.
The good news is that with the right guidance and resources, you can confidently tackle your epoxy floor installation project and achieve the professional finish you desire. Whether you’re aiming for a solid color epoxy, a metallic epoxy, or a flake epoxy system, this article will provide the information you need to succeed.
So, if you’re ready to transform your space with a durable epoxy coating, let’s dive into the world of epoxy flooring and discover how you can achieve professional results as a DIYer.
Introduction to Epoxy Floor Installation
Epoxy flooring is a popular choice for both residential and commercial spaces. Its durability, easy maintenance, and resistance to stains and spills make it an attractive option for various applications. Whether you’re looking to upgrade your garage, basement, or even your kitchen, epoxy flooring can provide a sleek and durable surface that lasts for years to come.
One of the key advantages of epoxy flooring is its ability to transform ordinary concrete floors into vibrant and visually appealing surfaces. With a wide range of colors and finishes available, you can create a customized look that suits your style and complements your space.
Another benefit of epoxy flooring is its suitability for DIY enthusiasts. While hiring professionals is always an option, many homeowners choose to take on the installation themselves. DIY epoxy floor installation allows you to save on labor costs and gives you the satisfaction of completing a project on your own.
By understanding the basics of epoxy flooring and its installation process, you can confidently tackle your own project. In the following sections, we’ll explore the different types of epoxy flooring, the preparation steps required, and the techniques for achieving a professional finish. Whether you’re a seasoned DIYer or just starting out, this guide will provide you with the knowledge and insights to successfully install an epoxy floor in your space.
Understanding Epoxy Flooring
When it comes to epoxy flooring, there are various types available that cater to different needs and preferences. By understanding the different types of epoxy flooring, you can make an informed decision that suits your requirements. Let’s explore the options:
- Solid Color Epoxy: This type of epoxy flooring offers a seamless and uniform appearance. It is available in a wide range of colors, allowing you to create a sleek and polished look for your space.
- Metallic Epoxy: If you’re looking for a more visually striking option, metallic epoxy flooring is the way to go. It incorporates shimmering metallic pigments to create a unique and eye-catching floor finish.
- Flake Epoxy: Flake epoxy flooring is known for its durability and resistance to stains. It consists of colored flakes that are embedded into the epoxy coating, providing a decorative and textured surface.
- Grind and Sealed Concrete: This option involves grinding the concrete surface to expose the aggregate, followed by sealing it with a clear epoxy coating. It offers a natural and contemporary look, enhancing the beauty of the underlying concrete.
When planning your epoxy floor installation, it is essential to consider the desired coating thickness. The thickness of the epoxy floor can impact its performance and durability. Thicker coatings provide enhanced protection and longevity, but they may require more materials and can take longer to cure.
Furthermore, there are various finish options available for epoxy flooring. These finishes not only enhance the appearance of your floor but also provide additional benefits. Some common epoxy floor finish options include:
- High Gloss Finish: This finish creates a glossy and reflective surface, adding depth and shine to your epoxy floor.
- Satin Finish: A satin finish offers a more subdued and matte appearance, providing a smooth and polished look.
- Textured Finish: If you prefer a more slip-resistant surface, a textured finish is a suitable choice. It adds traction, making the floor safer, especially in high-traffic areas.
By understanding the different types of epoxy flooring, considering the appropriate epoxy floor thickness, and exploring the available finish options, you can select a solution that meets your aesthetic preferences and performance requirements.

Preparing for Epoxy Floor Installation
Proper preparation is crucial for a successful epoxy floor installation. By following the necessary steps to prepare the surface, you’ll create a strong foundation for your epoxy coating and ensure long-lasting results.
Moisture Testing
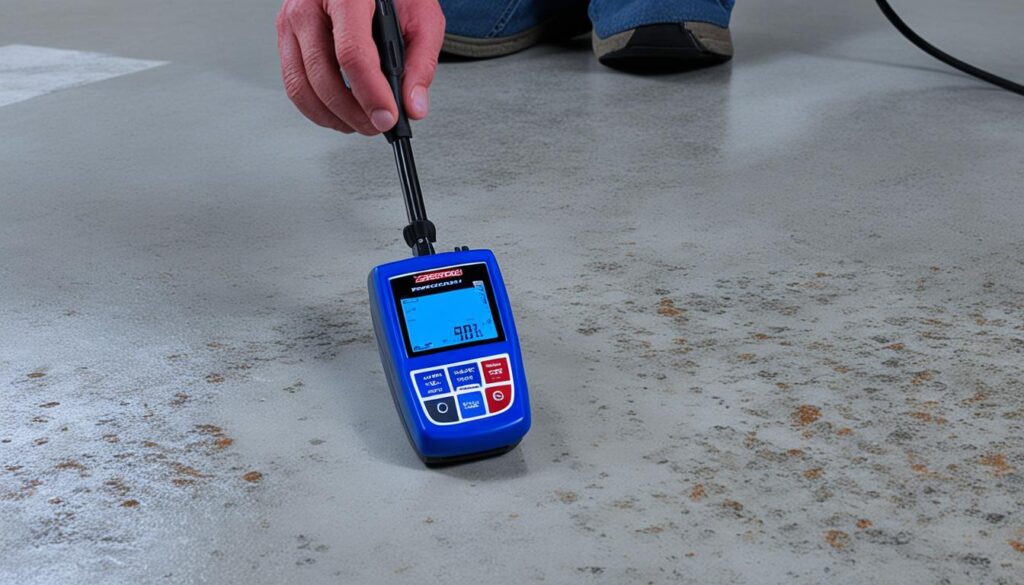
Before applying the epoxy, it’s essential to test the moisture levels of your concrete floor. Excessive moisture can interfere with the bonding process and cause the epoxy to bubble or peel. Use a moisture meter to assess the moisture content, and if necessary, take measures to mitigate the moisture issue before proceeding with the installation.
Filling Cracks and Holes
Prior to applying the epoxy, inspect your floor for cracks and holes. These imperfections can impact the overall appearance and performance of the epoxy coating. Use a concrete patching compound or an epoxy-based filler to repair any cracks or holes. Ensure that the patched areas are smooth and level before moving on to the next step.
Shot Blasting or Grinding
Shot blasting is an effective method for surface preparation that involves using a machine to propel small steel balls at high speeds onto the concrete surface. This process helps to remove surface contaminants, roughen the surface, and enhance adhesion between the epoxy coating and the concrete. Shot blasting creates a profile that allows the epoxy to penetrate and bond effectively, resulting in a durable and long-lasting finish.
Grinding is a widely available process of preparation that will acheive the necessary surface profile to allow the Epoxy Resin to bond chemically with the existing floor. This method of prperation will require multiple pieces of equipment to include a commercial concrete floor grinder a small hand grinder and a vacuum system to collect the dust that is produced in the removal of the surface finish.
Acid Washing has been promoted by those trying to offer an easy answer to the preparation problem. I will tell you this as someone who has seen many failed floor resurfacing projects do not consider this prepparation technique as an acceptable process. It will not adaquately create the environment for the epoxy to chemically bond with the surface and will ultimately fail.
In conclusion, proper surface preparation is key to achieving professional results in your epoxy floor installation. Conduct moisture testing, fill cracks and holes, and consider using shot blasting for optimal adhesion. By following these preparation guidelines, you’ll ensure that your epoxy coating adheres properly to the surface, resulting in a beautiful and durable epoxy floor.
Surface Preparation
Surface preparation is an essential step in achieving professional results with epoxy floor installation. By properly preparing the surface, you’ll enhance adhesion and overall performance of the epoxy coating. In this section, we’ll cover the following key aspects of surface preparation: cleaning the concrete floor, applying a vapor barrier if necessary, and the proper application of an epoxy primer.
Cleaning the concrete floor: Before applying the epoxy coating, it’s crucial to thoroughly clean the concrete floor to ensure proper adhesion. Start by removing any debris, dust, or loose particles using a broom or vacuum cleaner. Then, use a concrete cleaner or degreaser to remove any stains or oil spots. Scrub the surface with a stiff-bristled brush or a floor scrubber to ensure a clean and residue-free floor.
Applying a vapor barrier: In some cases, it may be necessary to apply a vapor barrier to prevent moisture from seeping through the concrete floor and affecting the epoxy coating. A vapor barrier, typically made of plastic sheeting, creates a moisture barrier between the concrete and epoxy. Ensure that the vapor barrier is properly installed and securely taped to the edges of the floor.
Tip: If you’re uncertain whether a vapor barrier is necessary, it’s recommended to conduct a moisture test to determine the moisture content of the concrete.
Epoxy primer application: Applying an epoxy primer is an essential step to improve adhesion and create a strong foundation for the epoxy coating. The epoxy primer acts as a bonding agent and helps the epoxy adhere to the concrete surface. Follow the manufacturer’s instructions for mixing and applying the epoxy primer. Use a roller or brush to apply an even coat, ensuring full coverage of the floor.
By following these surface preparation techniques, you’ll create an optimal surface for the epoxy coating, leading to a durable and long-lasting epoxy floor.
Mixing and Applying the Epoxy Coating
Once the surface is properly prepared, it’s time to mix and apply the epoxy coating. Properly mixing the epoxy resin and hardener is crucial for achieving a durable and long-lasting finish. Follow these instructions to ensure a successful epoxy application:
- Measure the resin and hardener: Carefully measure the recommended amounts of epoxy resin and hardener according to the manufacturer’s instructions. Use separate clean containers for each component.
- Mix the epoxy components: Pour the measured amounts of epoxy resin and hardener into a clean mixing container. Stir the mixture thoroughly for the specified time, ensuring that no streaks or unmixed portions remain. Pro Tip: mix at lower speed paying attention to not introduce air into the mix.
- Let the epoxy mixture rest: Allow the epoxy mixture to sit for a few minutes after mixing to ensure any air bubbles rise to the surface and pop.
- Apply the epoxy with a squeegee: Start by pouring the epoxy mixture onto the prepared surface and spread it evenly using a squeegee. Work in small sections to ensure complete coverage and avoid pooling or streaking. Pro Tip: The best squeegee will be a notched squeegee with 3/8″ V-cut notches to allow adaquate material to remain. this allows for enough product that you can pull the surface tightly and not leave it to dry for good quality surface thickness.
- Add multiple coats: Applying multiple coats of epoxy is recommended for enhanced durability and a smoother finish. Allow each coat to cure according to the manufacturer’s instructions before applying the next.
- Add decorative flakes: If desired, sprinkle decorative flakes onto the wet epoxy surface after the first coat. Use a light hand to achieve the desired coverage. The flakes will add texture and visual appeal to your epoxy floor. This technique is widely used in garage floor surfaces using vinyl flake chips typicall in a contrasting color mix and 3/8th to 1/2″ in size. This offers an attractive look and an easy to create texture to the surface.
- Smooth out the flakes: Once the epoxy has cured completely, use a clean roller or squeegee to lightly roll or push down on the flakes, embedding them into the epoxy layer and creating a smooth surface.
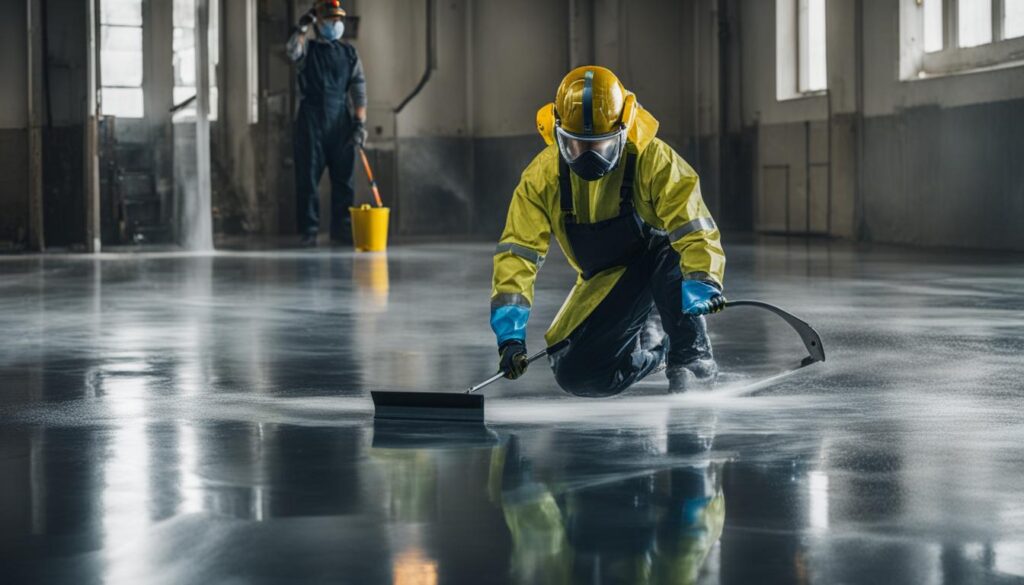
By following these epoxy mixing instructions and applying the epoxy with a squeegee, you can achieve a professional-looking epoxy floor installation. Applying multiple coats will improve the durability and overall finish of your floor, while adding decorative flakes will give it a unique and stylish look.
Curing and Finishing Touches
Once you have successfully applied the epoxy coating, the next step is to ensure proper curing and add finishing touches. Curing is essential to allow the epoxy to fully harden and achieve its maximum strength. Applying a topcoat provides additional protection and helps achieve the desired finish. Here’s what you need to know:
Curing Process
After applying the epoxy coating, it’s important to follow the manufacturer’s instructions regarding the curing time. Curing time can vary depending on factors such as temperature and humidity. Typically, epoxy floors require 24 to 72 hours to fully cure. During this time, it’s crucial to avoid foot traffic, heavy objects, and moisture exposure to prevent any damage to the curing surface.
Applying a Topcoat
Applying a topcoat is an optional but highly recommended step to enhance the durability and finish of your epoxy floor. The topcoat acts as a protective layer that guards against UV rays, abrasions, and chemical spills, ensuring the longevity of your epoxy floor. It also provides a glossy or satin finish, depending on your preference.
To apply the topcoat, ensure that the epoxy coating has fully cured. Clean the surface to remove any dust or debris. Then, carefully follow the manufacturer’s instructions for mixing and applying the topcoat. Use a roller or brush for an even application, and make sure to cover the entire surface. Allow the topcoat to dry completely according to the instructions before allowing any foot traffic or placing furniture on the floor.
Caring for Epoxy Floors
To maintain the beauty and longevity of your epoxy floor, proper care and maintenance are essential. Follow these tips to keep your floor looking its best:
- Regularly sweep or vacuum the floor to remove dirt and debris
- Wipe up spills promptly to prevent staining
- Use a mild, non-abrasive cleaner and a soft mop or cloth for routine cleaning
- Avoid using harsh chemicals or abrasive cleaners that may damage the epoxy coating
- Place mats or rugs at entry points to trap dirt and prevent scratching
- Use furniture pads or felt protectors to prevent scratches and dents
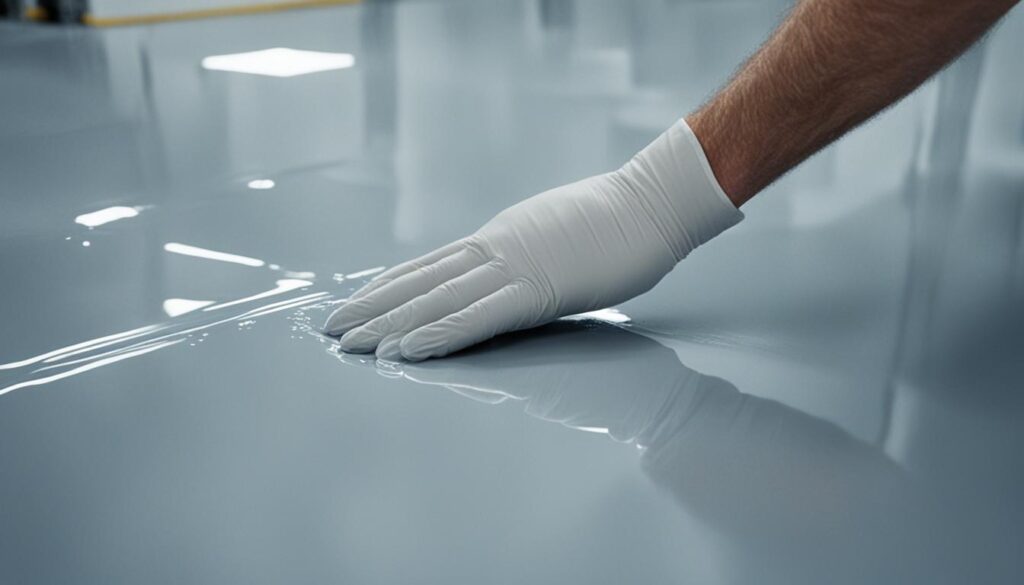
By following these care and maintenance practices, you can enjoy the long-lasting beauty and functionality of your epoxy floor for years to come.
As a Concrete and Epoxy floor installer of over 25 years and 1,000’s of applications I assure you that whether you DIY this project or high a pro you can get a finished product that will last 30-40 years if the concrete is sutable and the techniques are followed that I have outlined.
Common Mistakes and Troubleshooting
When it comes to epoxy floor installation, even the most careful DIY enthusiasts can encounter some common mistakes along the way. But don’t worry, we’re here to help! By being aware of these potential pitfalls and knowing how to troubleshoot them, you can overcome challenges and achieve professional-quality results.
One common mistake is not properly measuring and mixing the epoxy components. It’s important to follow the manufacturer’s instructions precisely to ensure the correct ratio of resin to hardener. Failing to do so can result in poor adhesion, uneven curing, or an inconsistent finish. Taking the time to measure and mix accurately will set you on the right path to success.
Another issue you may face is bubbles or blisters in your epoxy coating. This can occur due to trapped air or moisture during the application process. To prevent this, make sure to properly prepare the surface, remove any dirt or debris, and apply the epoxy in thin, even layers. If bubbles do appear, you can try using a heat gun or torch to gently remove them. Just be careful not to overheat the epoxy.
Lastly, a mistake that can impact the overall quality of your epoxy floor is rushing the curing process. It’s crucial to allow the epoxy coating to cure for the recommended amount of time before subjecting it to heavy traffic or placing furniture on it. Rushing the curing process can result in a weaker, less durable finish. Patience is key when it comes to achieving the best results.
As you embark on your DIY epoxy floor installation project, keep these troubleshooting tips in mind. By avoiding common pitfalls and knowing how to address any issues that arise, you’ll be well on your way to a successful and professional-looking epoxy floor. And remember, practice makes perfect, so don’t be afraid to learn from your mistakes and try again. Happy epoxy flooring!
FAQ
What are the benefits of epoxy flooring?
Epoxy flooring is known for its durability, easy maintenance, and resistance to stains and spills. It is also available in a variety of finishes and can enhance the appearance of any space.
Why is epoxy flooring a suitable option for DIY enthusiasts?
Epoxy floor installation can be a DIY project because it is relatively easy to apply and requires minimal equipment. With the right knowledge and techniques, DIYers can achieve professional-quality results.
What types of epoxy flooring are available?
There are various types of epoxy flooring, including solid color epoxy, metallic epoxy, flake epoxy, and grind and sealed concrete. Each type offers unique aesthetic and performance characteristics.
How do I determine the desired coating thickness for my epoxy floor?
The desired coating thickness for your epoxy floor will depend on the specific needs of your space. Factors such as foot traffic, intended use, and desired durability should be considered when determining the coating thickness.
What are the finish options for epoxy floors?
Epoxy floors can have a glossy or matte finish, depending on the desired aesthetic. Additionally, decorative flakes can be added to the epoxy coating to create texture and visual interest.
What are the necessary steps to prepare the surface for epoxy floor installation?
Surface preparation includes moisture testing, filling cracks and holes, and using shot blasting or grinding to create optimal adhesion for the epoxy coating.
How do I clean the concrete floor before applying the epoxy coating?
The concrete floor should be thoroughly cleaned using a degreaser and a pressure washer to remove any dirt, oil, or contaminants that could interfere with the adhesion of the epoxy coating.
Is it necessary to apply a vapor barrier before installing the epoxy floor?
Applying a vapor barrier is necessary in cases where moisture is present in the concrete slab. This helps prevent moisture-related issues that could affect the performance of the epoxy coating.
How do I properly apply an epoxy primer?
An epoxy primer should be applied using a brush or roller in even strokes, following the manufacturer’s instructions. This helps promote adhesion between the concrete surface and the epoxy coating.
How do I mix the epoxy resin and hardener for application?
Epoxy resin and hardener should be mixed in the correct ratio, typically 2:1, according to the manufacturer’s instructions. Mixing should be done slowly and thoroughly to ensure a consistent blend.
What techniques should I use to apply the epoxy coating?
The epoxy coating can be applied using a squeegee for smooth and even coverage. Working in small sections and using crisscross motions helps achieve a seamless finish.
Should I apply multiple coats of epoxy for my floor?
Applying multiple coats of epoxy enhances durability and creates a thicker protective layer. This is especially recommended for high-traffic areas and areas prone to impact or abrasion.
Can I add decorative flakes to my epoxy floor?
Yes, decorative flakes can be added to the epoxy coating to create texture and visual appeal. The flakes are sprinkled onto the wet epoxy and sealed in with a clear topcoat.
How long does the epoxy coating need to cure?
The epoxy coating typically needs to cure for at least 24-72 hours, depending on the product and environmental conditions. It’s important to follow the manufacturer’s instructions for the recommended curing time.
Should I apply a topcoat to my epoxy floor?
Applying a topcoat to the epoxy floor adds extra protection and enhances the final finish. The topcoat also helps with UV resistance and improves the overall longevity of the epoxy coating.
How do I care for epoxy floors?
Epoxy floors are easy to maintain. Regular sweeping or vacuuming, occasional mopping with a mild detergent, and promptly cleaning up spills will help preserve the appearance and performance of the epoxy floor.
What are some common mistakes in epoxy floor installation?
Common mistakes include improper surface preparation, incorrect mixing ratios, applying the epoxy in improper conditions, and inadequate curing time. These mistakes can result in poor adhesion and premature failure of the epoxy coating.
What are some troubleshooting tips for epoxy floor installation?
Troubleshooting tips include sanding or grinding away any rough or uneven spots, applying a second coat to fix imperfections, and consulting the manufacturer or a professional for specific issues or concerns.
Do you have any additional tips for DIY epoxy floor installation?
Additional tips include wearing protective gear, working in a well-ventilated area, thoroughly reading and following the manufacturer’s instructions, and seeking professional assistance if needed.
Source Links:
- Stamped Colored Concrete: Transform Your Outdoor Space
- Patio Makeover: Comparing Decks, Pavers, and Concrete Options
- Epoxy vs. Polyurea Floors: Which surface is Right for You?
- Achieving Professional Results with DIY Epoxy Floor Installation
- A Comprehensive Guide: Things To Consider Before Staining Your Concrete
- Unveiling the Secrets of Penetrating Concrete Stains: A Comprehensive Guide
- Mastering Concrete Staining: Must-Have Supplies and Expert Tips
- Choosing the Best Long-Lasting Concrete Stains: A Comprehensive Guide
- DIY Interior Concrete Staining: A Step-by-Step Guide for Stunning Results
- A Complete Guide to Sealing Concrete After Staining: Tips for Protection and Enhancement
- How to Remove Unwanted Concrete Stains: A Comprehensive Guide
- Mastering the Art of Concrete Preparation for Staining: A Comprehensive Guide
- Maintaining Your Stained Concrete: Essential Tips for Longevity
- Unlock Creativity and Savings with DIY Water-Based Concrete Stain
- DIY Epoxy Concrete Floors: A Step-by-Step Guide for Stunning Results
- DIY Concrete Stains: A Comprehensive Guide for Successful Projects
- Concrete Staining: DIY or Professional? A Comprehensive Guide
- Concrete Staining vs. Epoxy Coating: A Comprehensive Guide for Choosing the Right Finish
- Concrete Staining vs. Concrete Painting: A Comprehensive Guide
- Exploring Concrete Staining: Pros, Cons, and Considerations for Your Project
- Unlocking Creative Brilliance: Concrete Staining Ideas for Stunning Surfaces
- Mastering Concrete Staining: How to Solve Common Problems and Achieve Stunning Results
- Common Concrete Staining Mistakes And How To Avoid Making Them: A Comprehensive Guide
- Unveiling the Best Places to Buy Concrete Stains – Your Ultimate Guide
- Enhance Your Space: The Ultimate Guide to the Best Concrete Stains for Indoors and Outdoors
